Wednesday, November 9, 2011

Catch Up!

Holy smokes it's been almost a month since I last blogged. I don't know how you Mom's with kids and a  blog do it! All I have is a husband and a dog, and they are pretty low maintenance so I guess I am just a slacker...so it is time for some serious catch up!

Let's start with the basement...it is coming along nicely! We finished the treatment to the paneling and primed and painted it. Our process was pretty simple...we filled in the seams of the paneling then just used drywall mud and went to town. After it dried for a few days we primed it all then painted it. I will say it looks a whole lot different in person.
It's hard to get on camera how textural it is. But when you look at the before pictures...it is quite the improvement!


We are by no means finished with the basement but at least we can mark this job off our list!
This weekend I have plans to overhaul the bathroom down there, paint, new mirror, new counter, shower curtian, the works! I will post about that next week!

We finally got our new couch in our sunroom! It only took like 8 weeks of waiting! But I love it! These pictures are bad but its a really pretty linen.


We also got our new rug. We got it from rugsusa.com. That is the BEST place to get rugs from! This one is an 8x10 and I got it for around $150. They have the cutest patterns too and free shipping!!!


Ok so we still have a lot to do in here. Remember when I showed you the fabric I was going to use for the room and had everything planned out? Well I changed my mind...It's a wonder  I can even decide what to wear every morning! Anyway, This is the plan for curtains in there...I found the stripe fabric and I am going to buy some white curtain panels and add the stripe to those.


I also have 8 vintage movie posters that I am getting mats cut for and will hang above the sofa. I am super excited about those. All the mats are in really fun colors and I think it will had some color to those walls! Here's the lamp I am going to use in there! I am doing the white one and I am thinking of adding some kind of fun trim to the shades! They are from pottery barn.


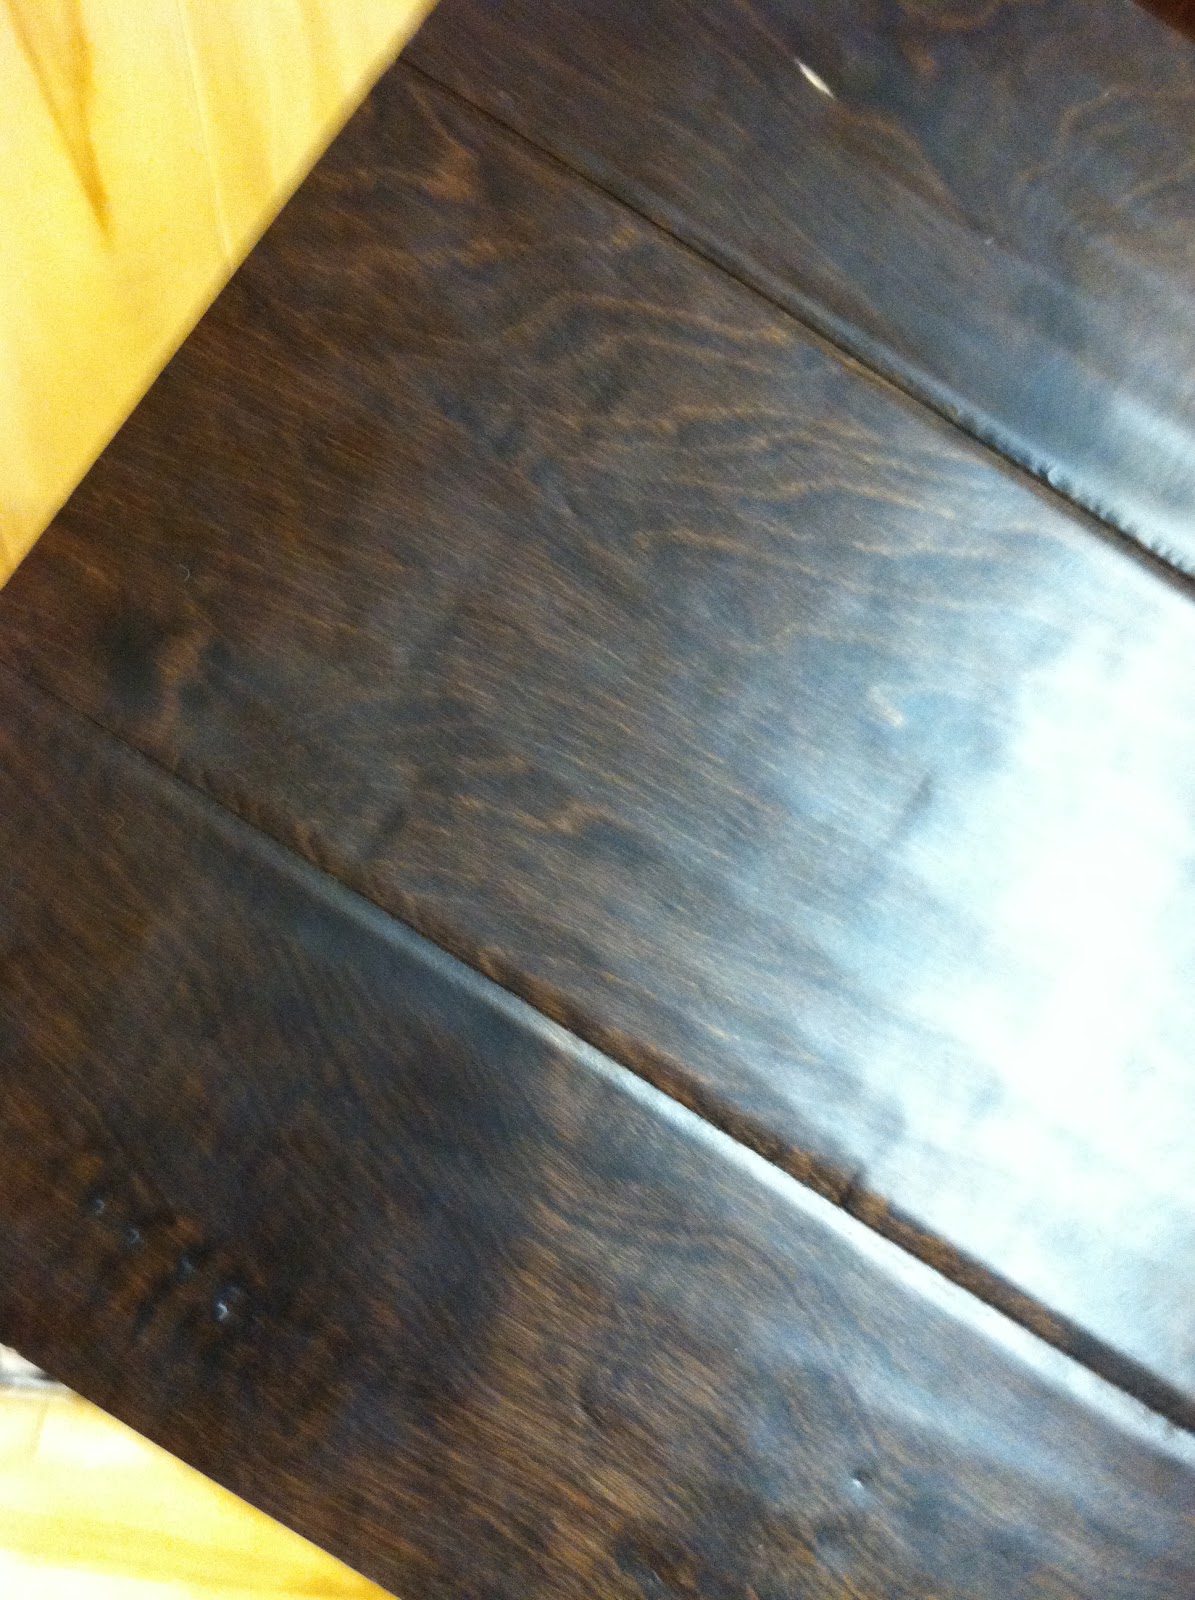
And in some kitchen related news...We went to Lumber Liquidators to get some flooring samples. We are planning on doing cork in the kitchen/dining/laundry room and hard wood in the hallway and front room (where the fireplace is). I have been reading a lot about cork flooring and I am really excited to use it! We knew we didn’t want tile in the kitchen because it is a much harder surface and I feel like it makes kitchens colder….the hardwood option was also nixed for the kitchen/dining because it would be a whole lot more expensive! The cork is really reasonably priced, it’s softer, and wears the same as hardwood. Here's a sample of one of the cork options.

My process was pretty high tech for choosing the best cork and hard wood options. I ruled out all the hardwood that was over 5$ a sq. foot. I knew I wanted something dark with wider planks as apposed to the skinny kind. Once I found a few hardwood options I liked I laid them with the cork to see what went better with what.


I basically came up with 2 options.  Option one was a speckled looking cork with almost a ridged looking hard wood. I have no idea what the technical term is for that. The second option was a pretty basic bamboo hard wood. The cork almost has a marble effect to it. Here is option 1:


And Option 2:

I am waiting to get the samples of these in the mail so I can see what they look like in our house. We also have to make sure whatever cork we use matches the wood floor we have in the sun room. I am hoping to have pictures of the hall closet makeover I started. Let's just say it turned into a whole lot more of job then I thought it was going to be...

Wednesday, October 19, 2011

Hallway Plans

I have always loved the idea of treating a hallway like a room. I feel like we often forget about this space and it is often times neglected. In all reality that is where most of the traffic is in a home, at least it is in ours! So why not make it a fun walkthrough to the other rooms in your house. So this is my plan for ours…I found this picture via pinterest and couldn’t get this image out of my mind! I love the texture and colors this has.

So I am going to base our hallway around it. The current state of our hallway has not changed since the gallery wall of frames I did. Lately I have been loving bead board ceilings! So my plan is to use bead board on the ceiling in the hallway like this…


I also finally decided on lights. We ordered a few different lights that ultimately hung too low. So I finally decided on this one…


We have three lights in the hallway and I love the vintage retro vibe these have. Normally these school house lights run pretty expensive but I found these for under $100. One thing I have learned since we bought this house is that lighting is important and lighting is not cheap! I plan to paint an entry way table and a cute little bamboo bench I have to go behind the front door and some cute little hooks above. I am thinking I will pull some colors from my inspiration print. One thing I am still undecided on is should I frame the print and hang it above the entryway table with other art, or with a mirror too?

I have also decided that our closets need an overhaul in the hallway. We are blessed with 2 HUGE storage closets. One is a coat closet and the other is a linen closet. The insides need painted and I also want to paint all the doors white. I also had this imagine saved and showed cody the detail on the doors and said that’s what I want to do on all the doors in the hallway and he surprisingly loved it!

They also need some serious organization. Here are some fun organized linen closets I found!


Its amazing how just seeing these pictures makes me excited to organize them! I have also always really loved the idea of a coat rack. I found this one on Urban Outfitters that just so happens to match my color scheme! Now here is the question, is it stange to have a coat rack even though we have a coat closet?

Too bad I have to do the not so fun stuff like painting the inside of the closets before I can do the fun stuff like organizing!!

Thursday, October 13, 2011

It's started...

The kitchen reno project that is. We kind of just jumped into without really planning much out. Call us crazy, but I guess that’s how we roll. I am thinking that this could be a very good freeing exercise for me. I tend to over plan, over think and want things to be all set up and ready to go before we start something like this. It started last week when Cody took the first layer of wallpaper off. It took him about 3 hours to do the kitchen, dining room and entry way by the garage. The next step was getting all the glue off the walls. We have been working on that in the evenings. I would say it is 90% off. Then last night we took a few cabinets down. It went from this…

To this…


It is amazing how much it opens the space up, the kitchen feels so much taller and bigger. We were always hitting our head on it, and since I have so much cabinet space it wasn’t an issue losing out on 2 cabinets. Our next plan of attack is to fix a few cabinets that house the microwave. We are still working on the best way to do that. We are also planning on taking down all the bulk heads or soffits above the cabinets whatever they are called and replacing with some recessed lighting and a few pendant lights above the sink and counter.

So I guess we do have some sort of plan. Our thought was to do all the reconfiguring of the cabinets and bulk heads first. Then we could tackle the sanding, priming, and painting of the cabinets. Then onto the tile backsplash I have planned, new counters and new floors. Easy peasy right?

Friday, October 7, 2011

Opinions Please!

So as you can tell by my picture, I obviously did not major in graphic designJ  But, as crazy as this looks it actually helps me visualize what our dresser could look like!
So, here are the options…


1, 2, and 8 are all stencils
3, 4, and 7 are actually fabric samples that I just like the pattern of. So, I would have to replicate these on my own without the help of a stencil.
5 & 6 are what we were initially thinking…just adding some small detail to each drawer by painting an outline of a box or with box filled in.
9 is a little out there but my thought on that was that I am loving the ombre effect lately, with the gradation in color. I could do this to each drawer separately or all the drawers as one (if that makes sense).
Ignore the color on them all too, I was thinking something navy but maybe bringing another color in would be good, or perhaps I should just leave them all white… I defiantly don’t want to make any rash decisions, so even after I decide what I should do I will probably wait to pull the trigger till I finish some other things in the room.

Ok so I now I need your opinion! Which number is your fav??

Thursday, October 6, 2011

Mrs. Hubbards Cupboards

Was that a children's story or nursery rhyme? I cant remember...maybe it was neither. I think it is about time to show you the progress we have been  making on our sun room. We started with the room looking like this...

all we did for a while was put up the drywall once we got rid of the paneling and that awkward window. Then we took a long extended break because I couldn't pick out a paint color. Well I finally did. It is Moonshine by Benjamin Moore, and I love it. Once the room was painted we put in the baseboard. We had to buy baseboard and shoe moulding for this room. If we would have just left the baseboard as is you would be able to see a gap between the wood floor and drywall.


So with the baseboard in, we focused our attention to creating a built in look with cabinets. When we looked at this house I saw this room and thought that a window bench/nook with a table would be perfect in the corner. Here were some of my inspirations images all found via pinterest.


I wanted that built in look of cabinets to look like it fit the space and was meant to be there but with room to add a small round table and plenty of pillows for a comfy vibe. I had been searching for something to work in that space for awhile. I tried Ikea, Lowes, and Menards and even thought about building something ourselves. Nothing I found seemed to be exactly right. We were either going to have to take apart something we bought to fit the space or spend a few hundred dollars on cabinets from Lowes. I didn't love either option. So one Saturday morning after a 2 hour long trip to Bass Pro, Cody and I stopped by Builders Warehouse. For those that don't live in the area it is located downtown Peoria in an old warehouse. It has five floors of home remodeling things at super discounted prices. Well, the fourth floor was the gold mine. It was full of unfinished oak cabinets in a variety of sizes. Score! We tried a few layouts with the different sizes of cabinets in the store and found 3 that would work perfectly. Our total came to $116  for all three cabinets.
This is what they looked like unfinished. I forgot to take a picture of all three of them before because I was too excited to get started on painting them. I did a coat of primer then two coats of white paint, the same paint we used on the baseboards.


We ended up take one of the doors off and covering the small opening with a piece of wood for a seamless look. This was before we added any of the molding.


You can see how we brought the baseboard around on the sides and the shoe molding around the whole front of the cabinets. I think that's what makes it look like a custom built in piece.


Lastly all we did was cut a piece of plywood for the top. That will get painted white and we still have a few more pieces of trim to add to cover up the front of the plywood and the corners. That fabric sample is what I am using to make the cushions out of! Here's a better picture of it.
Oh la la! I know this fabric is not every ones cup of tea but I love it! I love all the colors that it has. For curtains I am doing a navy and white strip with a two inch coral band around the edge.

And, I finally refinished a dresser I bought for $15 from the Habitat for Humanity Store. Here is what it looks like now. We are trying to decide what to do with the drawers. We don't know if we should stencil them with a fun pattern or add some lines like I made with the painters tape.


 Here is what it looked like before...

The drawers I painted white and everything else is navy. This is probably what the color really looks like...


So that's where were at. Any suggestions on what we should do with those drawers? Boxes, a pattern, stripes, or paint them navy too?? To many options and I have such commitment issues making paint decisions...