So this post has nothing to do with house related stuff. I just thought it would be fun to re-cap my summer! Since fall is defiantly here and I am in the mood for sweaters, soups and festivals I wanted to write about all my adventures I had this summer! Does anyone else feel like summer has flown by? But then all at the same time it feels like I crammed a lot of stuff in those 2 months! My first summer adventure could possibly be my favorite. I was able to spend a weekend with my college friends for one of their baby showers.

I cannot even tell you how much fun we had. There is just something about getting together with college girlfriends….it was exactly the kind of weekend I needed! All of our lives may be different but we still did the same stuff we did in college. Talked for hours, laughed until we cried and ate junk food on the floor in a circle:) two of them had their babies with them and it was so great to see how they have turned into such wonderful mommas! My friend Sarah was able to stay at our house for the night before we headed up to Michigan. This girl is the greatest and I think she might be one of the best Mom’s that I know.

She loves her kids to pieces and I am in constant awe of her knowledge when it comes to all things kid-related! I think I may have to hire her when I have a baby as a mommy consultant! We were able to go to the beach for the day which was great! This picture kills me but we were going to get a picture of all of us even if it killed us!

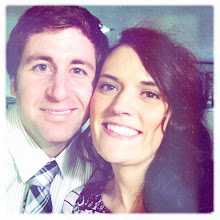
Next up was a visit from some of our friends Brian and Bethany Dario! It was a quick overnight visit but defiantly worth it! They were on their way back to Texas and made a quick stop at our place. It was so great to catch up with them, and we had just found out they were expecting so that made it even more exciting! We cherish our friendship with these two and as you can see by the only picture I took, we always have a fun time with them!


I was able to go to New York for the first time for a work trip.

Technically I was in New Jersey but we went to New York for a day. We managed to be in New York the day that the heat index was over 100 degrees! Since it was my first trip, we did all the touristy things. Empire State Building, Central Park, Times Square, the usual.


I surprisingly didn’t do any shopping which my husband was shocked about but I did manage to stop at Magnolia Bakery for their cupcakes! Oh my were they good…and yes I pretty much ate that whole box of mini cupcakes….I had to they were melting:)

Sometimes life throws very unexpected curves. My Grandpa passed away this summer very unexpectedly. I could write a book about what this man meant to me.

He was the kindest most helpful person I have ever met. He was a Mr. Fix-It man through and through. He probably tore most of the wallpaper off in our house. It was and still is heartbreaking but I know everyone in my family takes joy in knowing that he is in heaven today.

We had a wonderful time remembering and telling stories. All of his grandkids were able to be there which was a really great thing. It was wonderful seeing all of them and spending time reminiscing. We took a trip up to Michigan for some of the services and were able to see My Grandma and Grandpas house they bought when they were first married and the house my Mom grew up in. I was able to ride in the backseat with this girl for 8 hours…which made the trip much more enjoyable!

And last but not least a few weeks ago we headed up to Elgin to celebrate our nieces first birthday! I cannot believe this girl is already one year old.

To say she brings so much joy into our lives would be an understatement!

She was such a trooper through the whole day and I think played with the wrapping paper more than her presents!

My sister in law threw a great party and it was a great ending to our summer. I am looking forward to the fall and everything it brings! Since it is cooling off we are switching our house efforts from working outside to working on stuff inside! There could be a bathroom or kitchen reno in our near future! Stay tuned!